Bathroom Paint In Humidity Areas
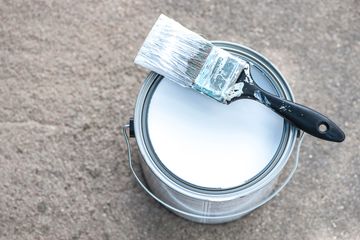

WHAT PAINT DO I CHOOSE FOR MY BATHROOM MAKEOVER??
Want to give your bathroom or laundry room a makeover? Painting is an inexpensive way to accomplish that task. So, what is stopping you from painting? Let me guess it`s probably one of the most frequently questions, I get from clients. What type of paint do I use for my bathroom? Well if you are asking that same questions I have the answer for you. I`m going to give you the tips to choose the best paint for your bathroom that will resist water and mildew. When moisture soaks into the paint, this allows mildew to grow. However, there are solutions that can be added to the paint to prevent mildew growth. This chemical is called mildewcide. If you have a mold problem currently and you are wanting to remove it and paint follow the process below. I follow the same process before painting walls that already has paint.

How to remove mold before painting
1.       Make sure the room is properly ventilated and follow steps 2-4 until mold is removed.
2.       Make a solution of bleach and water – usually 1 part bleach to 3 parts water.
3.       Using a stiff-bristled brush, scrub the molded areas.
4.       Rinse thoroughly and dry.
5.       A lot of work??? Now its time to apply the paint.


Top Paints That Resist Mildew

1.       Behr Premium Plus Enamel
2.       Valspar Reserve
3.       Behr Premium Plus Ultra
4.       Benjamin Moore Aura
5.       Clark+Kensington Enamel
6.       Behr Marquee


Just to mention a couple that don`t resist mildew are HGTV Home by Sherwin-Williams, Ovation Glidden Premium, and Color Place Interior. 

Thank you for joining the blog hope these tips help you with your next painting project.
 Imperial Home Improvement LLC

 Providing Quality Every Inch


Textured Ceilings

Tired of boring ceilings?? 

Ceilings are the most exposed areas of a home. Depending on physical and natural lighting at times your ceiling may look different. Have you ever had your windows open enjoying the sunlight and noticed an imperfection that wasn`t noticed before? For many years building contractors and homeowners used plaster in the homes and buildings . However, drywall(sheetrock) is more popular in modern homes and buildings. Due to the fact that dry wall is quicker, less expensive, and easy to install. To hide imperfections in the drywall after installation it is recommend that finishes are placed on the drywall before painting. The finishing process includes taping, mudding, and sanding. 

Four Recommend Textures For Your Ceilings 
  • Skim Coat- This finish is the simplest one to apply and is used in areas such as bathrooms and kitchens. Skim coating is the process of a very thin coating of all-purpose drywall mud applied with a 10-inch taping knife. If you are a homeowner or you are doing an wallpaper install the skim coat finish would be ideal for your project.
  • Popcorn- One of the easiest textures to install. It is also one of the messiest to apply, as the popcorn texture must be mixed into joint compound and applied via a special machine equipped with an air hose. Each coat should be applied as lightly as possible so too much of the mixture does not accumulate in one location and create bubbles. After years a popcorn surface may look worn and dated as this textured surface easily holds dirt. Want to replace the old popcorn? Popcorn ceilings are just as easy to remove as they are to apply. Simply spray the location with water and scrape it with a taping knife, then reapply the texture for a fresh look.
  • Brush- Brush texture is also known as stomped ceiling. After sanding the ceiling, apply mud with thin consistency using a roller, making even rolls, then crossing the roller in the opposite direction to even the mud layer. This technique gets its name by the way the mud is slapped onto the ceiling with brushes specifically made for this purpose. When slapping the mud onto the ceiling, start at the edges and work inward. Turn the brush one-half turn to the right or left every time you slap on additional mud.
  • Swirl- This technique is considered the most expensive and time-consuming ceiling finish. The key to this technique is to not allow the joint compound to dry too quickly. Before applying the texture, sand the ceiling, paying particular attention to the perimeters. Two people must perform this job, with the first applying the mud to the ceiling and the second following immediately behind, creating swirls with a swirling brush. Perform this work in rows, with the second row overlapping the first, the third row overlapping the second, etc., until the entire ceiling is completed. After the ceiling is completed, use a flat-edged knife for cleanup.


           Website